

It’s been 3 months since I planted my first herb garden, which includes Lemongrass, Basil, Peppermint, Lavender, Rosemary and Oregano. No one is more surprised than me that the herbs are alive, growing and thriving – disproving my notions that I didn’t have time for this venture and that I hadn’t inherited my mother’s green thumb. Alive and thriving, despite the bout with Mother Nature early on. In fact, the herbs are ready to be preserved.
Being new to the whole herb garden thing, it follows that I would have to do some research on preserving herbs. I would have posted this blog 2 days ago, if I hadn’t gotten so overwhelmed by the amount of information and contraptions available for drying herbs! Seriously, there are drying racks and stacking trays and several ways to preserve herbs.
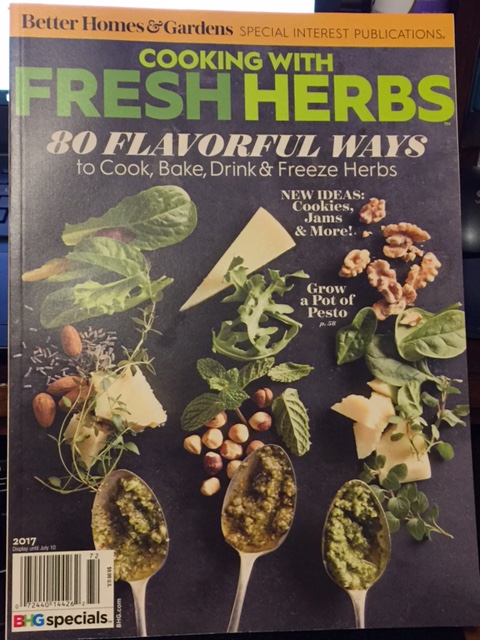
True to form, I’m going to pick the quickest, most convenient method that still ensures a good, quality end product. A Better Homes & Garden magazine on Cooking with Fresh Herbs caught my eye, because, hey, I have fresh herbs! In addition to recipes, the magazine had information on the most common herbs and an article on DIY Herb Preservation.
The basic steps for herb preservation are pretty simple, with the method for drying being the biggest variant. The steps below are a summary of the DIY Herb Preservation article and several Internet posts.
- Choose herbs. There’s some differences of opinion on whether it’s best to cut the herbs before or after they bloom, but all agree you want herbs that look good, taking care to pull out any dead leaves or stems. As it’s mid-July, 1,000 degrees (OK, low 90s) and humid here in Middle Tennessee, I’m starting this process this weekend, because I’m not sure how much longer my herbs are going to be looking good.
- Wash and dry as much as you can before starting the preservation process. Remove excess water from the herbs using a salad spinner and/or patting dry with paper towels.
- Preservation – the drying process. Among the most popular ways to dry herbs:
- Hanging – Gather small bunches of the herbs and secure with either cotton string, twist ties or rubber bands and hang in a well-ventilated area. Depending on the size of the herb, this process may take 1-6 days, with smaller-leafed herbs taking about 24 hours to dry and larger-leafed herbs taking about 6 days.
- Room temperature – Lay herbs flat on a sheet of wax paper and let dry at room temperature. Drying time is the same as for hanging the herbs.
- Microwave – Place herbs between 2 paper towels and microwave for 1 minute, testing for dryness every 20 seconds. This method works best for heartier herbs, like Rosemary, Thyme and Oregano, but not so much for delicate herbs, such as Basil and Parsley, which may turn brown and whither. There is also a risk of the paper towels catching fire in this scenario, which makes me think this is not the method for me.
- Oven – Place herbs on a 1-inch or less cookie sheet and put in the oven on low heat, less than 180 degrees, for 2-4 hours. When the herbs are dry, for any of these methods, the leaves will crumble easily. The same methods may also be used to dry lavender and other buds.
- Food dehydrator – Preheat the dehydrator to between 95-125 degrees, depending on the humidity of where you live. Higher temperature for higher humidity. Remove large leaves from stems to speed drying times. Drying time will be 1-4 hours, depending on the herbs. Stack delicate herbs, which will dry faster in the top trays of the dehydrator for easy, early removal and heartier herbs that will take longer to dry on the bottom. Be sure to have some process for knowing which herbs are in which tray, as it might be more difficult to identify the herbs after they dry.
- Storage – Store dried herbs in airtight containers in a cool, dark place for up to 1 year. Keep the leaves whole until you’re ready to use them. Be sure the herbs are truly dry before storing to prevent mold from ruining your harvest.
- Use – Crush dried herbs before use
I’m going with the room temperature method and dehydrator methods of preservation and will share pictures. In the meantime, some before pictures of Oregano, Rosemary, Lavender, Lemongrass and Chocolate Mint:


Alas, I don’t think I’ll get a harvest out of Peppermint. Note to self: remove the “degradable” pot before planting:

I’m already planning on expanding my herb garden next year with basically any herb I can find. One of the ways to test the purity of essential oils is the smell test, where you compare the smell of the herb to the smell of the essential oil. In order to smell the herb, it’s best to rub a leaf between two fingers, which releases the essential oils. Likewise, it’s recommended to crush dried herbs between two fingers to release the oils and flavor. You can also use a mortar and pestle. Small wonder that I find the smell of herbs as divine as essential oils.
Until next time, herb child in the city, growing wild and looking pretty…
Oils and Spoils Updates
In addition to the July promos (freebies) mentioned in a previous post, four of the most popular Young Living Essential Oils are 15 percent off and a Do-It-Yourself kit, with enough supplies for 6 people makes its debut.


Add to your collection or try this interchangeable snap jewelry at up to 60 percent off through the end of the month.


Leave a comment